
Frequently Asked Questions
Frequently Asked Questions
Everything you need to know about button making, our machines, supplies, warranties, and ordering. Browse the sections below, or reach out — real people answer the phone at our Plano, TX office.
Lifetime warranty against manufacturing defects • 365 Day Return Policy • Family-run in Plano, TX since 2005
No matching answers found
Try a different word, or just ask us directly — call (972) 985-5074 (Monday–Friday, 8:00 a.m.–4:30 p.m. Central) or email [email protected].
Getting Started6 answers
Making buttons looks complicated. Where do I begin?
To get started, follow our step-by-step button-making tutorial or watch our video on how to make a pinback button.
If you still have questions, please call or email us. We are happy to make recommendations for your specific application.
What is the difference between Beginner and Professional Systems?
The only difference is the type of paper cutter included. Beginner Systems come with an Adjustable Rotary Cutter, while Professional Systems include a Punch Cutter.
Both systems contain the same professional-grade button machine, pin-back button parts, and our Button Essentials design collection. Three months of free access to our Build-a-Button Design Center is also included with every kit.
What is the difference between a Rotary Cutter and a Punch Cutter?
Adjustable Rotary Cutter: Cuts circles from 1.313" to 4", so you can use the same cutter with different button sizes. The cutting wheel will need to be replaced periodically.
Punch Cutter: Cuts one specific size matched to your machine. It is easier to operate and is the preferred choice for high-volume production environments.
What size button machine do I need?
The most popular sizes are 1", 1.25", 1.5", 2.25", 3" and 3.5". The right size depends on your application:
- 1" and 1.25" — ideal for small promotional buttons, keychains, zipper pulls and jewelry pieces.
- 2.25" — ABM's best-selling size. It is large enough to be read at a distance but small enough to wear comfortably on a jacket or lanyard.
- 3" and 3.5" — best for maximum visual impact, photo buttons, and applications where text and photos need to be shown.
Read our full guide: What size buttons should I make?
How do I find out what size button machine I have?
Our free Button Template Guide will tell you in under a minute. It prints the cut lines for every common round size at exact, life-size scale — hold your machine's die against the rings to find the match.
How to use it
- Print it at full size. In your print dialog set scaling to 100% / Actual Size, not "Fit to Page" or "Shrink to Fit" — fit-to-page resizes the rings and the guide will not measure correctly.
- Cut along the solid outer line of any ring you want to test. The solid line is the button's cut line; the dashed inner line is the printable picture area.
- Drop the cut circle into the shallow (lower) die of your button maker. When a ring seats neatly into the die, that is your machine's size.
Can one machine make multiple button sizes?
Some competing button makers use plastic interchangeable dies to make multiple sizes — but those dies are not professional-grade and will wear out faster. Our machines use solid steel dies precision-made for one specific size.
If you need multiple sizes, we recommend buying a separate machine for each size. Because the dies are the most expensive component to manufacture, a dedicated single-size machine costs no more than a multi-size machine and you gain the ability to run two sizes simultaneously and keep production going if one machine ever needs service. Our 3-in-1 Button Making Kits bundle three machines together for exactly this reason.
Button Making Basics7 answers
Do I need special paper to make buttons?
No, you do not need specialty paper. Standard 24 lb. office or copy paper produces excellent results for most button sizes. For larger buttons (3" and above), slightly heavier paper (32–58 lb.) can help reduce visible wrinkles at the edge crimp.
Avoid very heavy cardstock, as it is difficult to crimp cleanly. Coated photo paper works only on our Model 300 and Model 350 Photo Button Machines. For a full guide: Three steps for picking the right paper.
In matters of brightness, when printing designs on plain white paper, look for an option that has a brightness level of 100+. This will provide a pure white background for your design and offer the crispest, brightest print. Watch for terms such as "super white" and "ultra bright" for the best quality. Essentially, the cleaner and brighter the white, the more vivid your print will be.
Can I use photo paper or heavier stock?
Yes but only with our dedicated photo button machines. The Model 300 and Model 350 Photo Button Machines are specifically engineered to accept regular computer paper or heavier photo paper with a weight of 24 - 58 lbs.
What do your complete button systems include?
Every Beginner and Professional System includes:
- A professional-grade steel button machine
- A paper cutter (rotary or punch, depending on system level)
- Pin-back button parts (shell, mylar, and pin back)
- Button Essentials design collection
- 3 months free access to the Build-a-Button Online Design Center
All you need to supply is a printer and standard paper. Everything else is included.
How do I avoid a bubble in the mylar edge?
Bubbles at the mylar edge are almost always caused by one of three things: mylar placed slightly off-center, a small piece of debris in the die, or crimping before the mylar is fully seated. Make sure your graphic is trimmed accurately and that the mylar disc lays flat before pressing.
Bubbles at the edge of your mylar can be a side effect of using a laser printer to print your graphics. Laser printers can cause mylar to slip when you crimp your button together, especially if you have a full bleed in your design. Toner from laser printers contain wax and even if you have made 100 perfect buttons, the printer can decide to dump a little extra wax on that page and suddenly your buttons won't work. To determine if the toner is causing your issue, try making a button with plain paper. If it works, the toner is causing the problem.
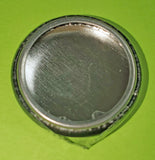
Are ABM supplies compatible with Badge-a-Minit machines?
No. All of our machines use industry-standard button-making supplies. Badge-a-Minit is a different manufacturer that intentionally makes their parts slightly larger than the industry standard, so their parts will not fit industry-standard machines and vice versa.
If you have a Badge-a-Minit machine, you must use BAM-sized supplies. Shop Badge-a-Minit parts and supplies for manual 2.25" and 3" Badge-a-Minit machines.
I bought a button maker on Amazon or overseas — will your parts fit it?
Usually not. Most imported machines sold on Amazon, AliExpress, and similar marketplaces are built to metric sizes, while our supplies are made to the U.S. industry standard. A "1 inch" imported machine is often actually 25mm, and the difference is enough to cause jams, incomplete crimps, and wasted parts.
Not sure what you have? Call us at (972) 985-5074 with your machine's brand name and the measured diameter of a finished button, and we will tell you honestly whether our parts will work.
How do I mount my button machine to a table?
All of our machines include mounting holes in the base plate and come with hardware for table-top mounting. Mounting is highly recommended for high-volume production — it keeps the machine stable and reduces operator fatigue. See our short tutorial: How to mount a button maker.
Design & Software7 answers
What is Build-a-Button and do I need it?
Build-a-Button is button-making design software developed specifically for the button industry. It lets you create, size, and print button graphics with the exact dimensions your machine requires — no guessing about bleed areas or crop marks. Every complete kit purchase includes three months of free access.
You do not need Build-a-Button any design software (Word, Canva, Photoshop, etc.) can produce print-ready graphics — but Build-a-Button is purpose-built for this workflow and produces the cleanest results. Learn more about Build-a-Button.
What devices and browsers does Build-a-Button work on?
Build-a-Button runs right in your web browser — there is nothing to download. It works on Windows, Mac, Android, and iOS. For the best experience, use a tablet-sized or larger screen with Google Chrome or Mozilla Firefox. Microsoft browsers, Chromebooks, and similar devices are not supported.
Because it is browser-based, it needs an internet connection. If you are at a school and Build-a-Button will not load, your school's firewall is likely blocking outside servers — ask your IT department to allow access to our servers and the design center will load normally. Full details and free demo.
Where can I find graphics for my buttons?
Several good sources for button graphics:
- Build-a-Button — includes a built-in template library, clip art, and design tools sized for buttons.
- Free stock sites — Unsplash, Pexels, and Pixabay offer royalty-free photos. For vector art, SVGRepo and Freepik have large free libraries.
- Your own photos or artwork — any image you own can be imported into Build-a-Button or your design software of choice.
For a full breakdown: Where can I find graphics for my buttons?
Is a laser printer or inkjet better for making buttons?
Both work well. Inkjet printers generally produce more vibrant, photo-quality color at a lower upfront cost. Laser printers produce sharper text and dry instantly with no smearing risk, making them a better choice for high-volume production runs.
For a detailed comparison: Laser printer vs. inkjet for button making.
How do I achieve a matte finish on my button graphics?
The mylar included with standard button parts gives a glossy finish. To achieve a matte look, see: Achieving a matte finish for your pinback button graphics.
What file format should I use for my button graphic?
For printing, high-resolution JPEG or PNG files (at least 300 DPI at final print size) produce the sharpest results. SVG files are ideal when working in Build-a-Button because they scale without quality loss. Avoid low-resolution images pulled from websites, as they will appear pixelated when printed. Read more: What type of file format should I use?
Can I use Build-a-Button to make name badges or other items?
Yes. Build-a-Button supports mail-merge printing, which allows you to produce a large batch of individually personalized buttons (such as name badges) from a spreadsheet in a single print run. It also includes mockup tools for keychains, magnets, ornaments, and other button-compatible accessories. See: Using mail merge for personalized buttons.
Ordering, Payment & Shipping8 answers
What payment methods do you accept?
We accept Visa, MasterCard, American Express, Discover, and PayPal. We also accept money orders and personal checks. Schools, libraries, universities, and government agencies may pay by purchase order, with Net 30 terms available for approved institutional accounts.
Do you accept purchase orders?
Yes — we have been processing purchase orders for schools, public libraries, universities, and government buyers for over 20 years. The fastest way to submit yours is to upload it on our Purchase Orders page. It lands directly in our sales queue, and our team confirms receipt within one business day.
Net 30 terms are available for approved institutional accounts, and a current W-9 is available on request. Need a quote to build your PO around first? Build a cart of what you need and then download a PDF quote in the cart. Questions? Call (972) 985-5074, Monday–Friday, 8:00 a.m.–4:30 p.m. Central.
My organization is tax-exempt. How do I remove sales tax from my order?
We only charge sales tax in the states where we are registered to collect it. If your organization is tax-exempt, upload your exemption certificate on our Sales Tax Exemption page before placing your first order. Once verified, the exemption is applied to your account automatically and stays on file — you only have to do it once.
Please note: sales tax cannot be refunded after an order has already been placed, so file your certificate first.
How long will it take to ship my order?
In-stock orders ship within 24–48 hours of placement, and most orders placed on a business day ship the same day. Orders paid by purchase order ship within 1–2 business days of PO approval. Shipping costs and estimated delivery times are displayed at checkout before you confirm your order.
Large bulk orders or back-ordered items may take longer — if your event or program has a hard deadline, tell us and we will confirm the lead time before you commit.
Do you ship outside the United States?
Yes, we ship worldwide. The customer is responsible for any import duties, tariffs, and taxes that apply upon delivery. For Canada-specific shipping information and rates, see our Canada shipping page.
What is your Best Price Guarantee?
We will meet any competitor's advertised price on the same button equipment or supplies — and every purchase is still backed by our lifetime warranty against defects on all of our pinback button machines.
How it works: price matches are valid only for orders placed by phone with our sales department at (972) 985-5074 (Monday–Friday, 8:00 a.m.–4:30 p.m. Central), and the request must be made at the time you place the order. Prices are compared on both the product price and shipping charges, and matches are limited to two of the same product shipped to the same address.
The competing retailer must be an authorized stocking distributor with the identical product in stock, correctly priced, and publicly advertised. We cannot match auction websites, sellers without regular phone hours, made-to-order products, special-order items, or graphic design services. Read the full terms: Best Price Guarantee.
Do you have a customer rewards program?
Yes. Our ABM Customer Rewards Program lets you earn points on every purchase, which can be redeemed for discounts on future orders. See the rewards page for current point values and redemption options.
What is your return policy?
We offer a 365 Day Return Policy — a full year to decide, one of the most generous return windows in the industry. To start a return, contact us first to request an RMA (return authorization) before shipping anything back; returns sent without an RMA cannot be processed.
If you ordered the wrong item, you are responsible for return shipping. If the error was ours, we will send you a prepaid return label. Certain items — such as custom, made-to-order, and clearance products — are not returnable, and restocking fees may apply depending on the condition of the return. Full details, timelines, and exclusions: 365 Day Return Policy.
Troubleshooting & Maintenance6 answers
Why does my button machine jam?
Jams are almost always caused by one of three things: stacked/nested parts, materials that are too thick, or a die that needs cleaning or lubrication.
Nested parts: Button shells, flatbacks, magnet backs, coaster backs, and key chain backs are thin metal and can nest together almost invisibly — sometimes just one extra shell is enough to jam things up. Grab a handful and gently drop them on your work surface; they'll separate right out. Mylar does the same thing — those clear protective sheets can stick together in pairs without you noticing, and that extra thickness is enough to cause problems.
Material too thick: Cardstock, glittery paper, or fabric that's heavier than your machine is designed for is another common culprit. Button makers are built for a specific material thickness, so even if a design looks great online, it can jam your machine if it's too thick. Check out our article on paper for button making for guidance on what works best.
Die maintenance: Debris in the die set or a dry die post can also cause jams. Clean the dies with a soft cloth and apply a small amount of machine oil to the die post regularly.
Watch our unjam tutorial: How to unjam a button maker. For a full diagnosis guide: Why do button makers jam?
How do I fix crimping problems?
This usually isn't a broken machine or defective parts — it's almost always one of these:
- Wrong paper: Use standard 24 lb copier paper. Cardstock or the wrong weight will keep buttons from pressing together fully. See our paper guide.
- Graphics cut unevenly: Circles must be cut exact, with clean edges no bigger than the mylar. A proper cutter makes a big difference — see our cutter guide.
- Laser printer toner: Wax from laser toner can cause mylar to slip. Test with plain paper — if that works, use a silicone stick on the crimp die, or reduce your bleed by .125".
- Extra shells stuck in the die: Check the upper pickup die with your finger — if there's no hole, a part is lodged inside. Watch our unjamming video for the fix.
- Needs maintenance: Regular lubrication keeps things running smoothly. See our maintenance video.
For a comprehensive guide: Common crimping issues solved.
Why does my button have rust?
Rust is almost always caused by moisture — and it shows up more as the weather warms and humidity rises:
- Wet ink: If you're using an inkjet printer, let the ink dry completely before pressing — ideally overnight. Any leftover moisture in the ink can lead to rust over time.
- Temperature swings: Taking buttons in and out of hot/cold environments (like a car on a summer day) causes condensation inside storage containers, even sealed totes — and that moisture leads to rust.
- Storage: Toss silica packets (reused or store-bought) or plain dry rice into your storage containers — both work great as moisture absorbers to keep buttons rust-free.
More detail: Why does my button have rust?
How do I fix my graphic punch handle?
This usually means the handle has slipped out of place rather than the punch being truly jammed. An easy fix:
- If you can't feed paper into the slot, or you see daylight on one side but not the other, slowly turn and pull the handle until it pops back into place.
- Need more detail? Follow our step-by-step un-jamming guide.
- To prevent this going forward, run through basic maintenance regularly — see our lubrication and maintenance video.
How do I lubricate and maintain my button machine?
Regular lubrication keeps your machine operating smoothly and extends die life. Apply a small drop of machine oil to the die post every 500–1,000 buttons, or any time the press feels stiff. Clean the die surfaces with a soft, dry cloth after each session. Watch our maintenance video: Button maker lubrication and maintenance.
What is an ejector rod and how is it used?
An ejector rod is a small aluminum cylinder that fits over the bar in your graphic punch cutter to help pop out the cut graphic.
- Included with: 1"–1.75" punches from ABM. Available separately for the 2.25" Graphic Punch and Photo Punch — note these two use different rods, so match it to your model.
- How it works: Slide it onto the bar, pull the handle to cut, then push the rod from underneath to eject the graphic.
- Do you need one? You can cut without it, but especially with smaller sizes, fishing graphics out by hand can crease or bend edges and slows you down. Worth it if you're making buttons in volume.
Full explanation: What is an ejector rod and how is it used?
Warranty & Support7 answers
What warranty do you offer on your button machines?
We stand behind everything we sell. All of our pinback button machines are covered by a lifetime warranty against manufacturing defects — included free with every machine. If a machine ever fails due to a defect in materials or workmanship, we will repair or replace it at no charge to you. This is one of the most comprehensive warranties in the industry and reflects the quality of the solid steel dies and components in every machine we sell.
Note that the lifetime warranty covers defects — accidents, drops, and misuse are covered separately by our optional Ultimate Extended Warranty (see the next question).
What if I accidentally damage my machine? Is that covered?
Accidental damage is not a manufacturing defect, so it is not covered by the free lifetime warranty — but it is exactly what our Ultimate Extended Warranty is for. It is a no-questions-asked plan covering 100% of parts and labor with no deductibles: user error, neglect, misuse, normal wear and tear, unauthorized modifications — basically anything that can ever happen to the machine except loss or theft.
Coverage is available as a 3-year plan or upgraded to lifetime coverage, for both button machines and punch cutters. A few important terms: the Ultimate Extended Warranty can be purchased only at the time you buy your machine or cutter, it is valid for the original purchaser, and it covers a single claim during the warranty period (after a repair or replacement, you may purchase a new warranty to continue coverage). Details and pricing: Ultimate Extended Warranty.
Why should I buy from American Button Machines?
Several reasons set us apart from other button machine suppliers:
- Solid steel dies — not plastic. Our dies are precision-machined for long-term professional use.
- Lifetime warranty on all pinback machines against manufacturing defects, plus an optional no-questions-asked extended warranty for everything else.
- Best Price Guarantee — we will meet or beat any competitor's advertised price on the same product.
- 365 Day Return Policy — a full year to make sure it is right for you.
- USA-based support — real people answer the phone at our Plano, TX office, Monday–Friday, 8:00 a.m.–4:30 p.m. Central.
- Industry-standard parts — your supplies work with any other industry-standard machine and are widely available.
For a detailed comparison: Why should I buy your machine?
Are your button machines made in the USA?
Yes. Our pinback button machines and supplies are made in the USA, machined from solid steel to industry-standard tolerances. That's why parts are easy to source, why the dies last, and why every pinback machine carries a lifetime warranty against manufacturing defects. It's also why our supplies fit any industry-standard machine, rather than locking you into one brand. For more on why this matters: USA vs. imported button makers.
What is a crimp die adapter?
The small, flat, round disk included with your 1" button maker is a crimp die adapter — it's used to flatten medallions (great for game pieces, bracelets, rings, lapel pins, and more) instead of leaving them with the standard rounded button shape.
How to use it (3rd press operation):
-
- Place a shell (sharp side down), graphic, and mylar into the pickup die.
- Place the crimp die adapter face up (ridge visible) into the crimp die, top with the flat plastic medallion, and press each side as usual (shell side first).
- Remove the finished button, flip it back into the pickup die (graphic side up), and press a third time.
- Remove your finished, flat medallion.
Note: only use the adapter for plastic-backed medallions — not standard buttons.
See our full explanation: What is a crimp die adapter?
I have a new button maker — now what?
Start by reading the instruction sheet included in the box, then watch our how to make a pinback button video. And if anything is unclear, call us at (972) 985-5074 — we are glad to walk you through setup.
Do you sell replacement parts?
Yes. We carry a full range of replacement and spare parts including cutting wheels for rotary cutters, die sets, ejector rods, punch handles, and mylar in all standard sizes. Browse our Parts and Accessories collection or call us if you are not sure which part you need.
Still Have Questions?
Our team is happy to walk you through choosing the right machine, placing a purchase order, or troubleshooting your setup. Real people, real answers.
(972) 985-5074Need more info?
Check out our blog posts for guides, tutorials, troubleshooting tips, and button-making ideas.
Visit the blog