How to Make a Coaster Button
Making a coaster button is fun and very easy to do! We have put together this step-by-step tutorial to guide you through the process.
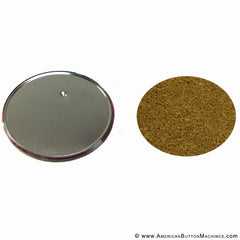
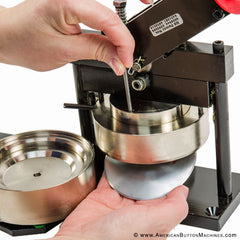
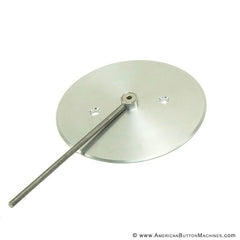
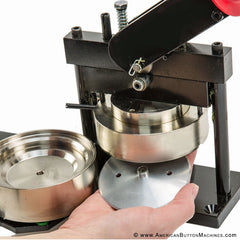
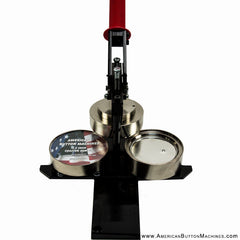
| Step 1: Familiarize yourself with the parts of the coaster button. The parts consist of: Mylar, Front Shell, Flat Back and Adhesive Backed Cork. You can purchase the complete coaster sets in our store. | Step 2: A coaster insert and rod are a vital part of the coaster making process. The coaster insert will help you achieve the flattest surface possible. The rod will be used to remove the coaster insert when the button is finished. | Step 3: Gently guide the coaster insert into the upper die as shown in Step 4. The insert is magnetized and will snap into the center hole shown below. Make sure the insert is fully seated and centered properly or damage can occur to the machine and insert. |
 |
 |
 |
| Step 4: Inside the upper die, directly in the middle as described in Step 3 is the hole for the magnetized coaster insert. If the insert is installed properly it will snap into place and not move around. | Step 5: Place the shell, graphic and mylar into the pick up and the dimpled back into the crimp die; proceed as you would when making any other type of button. | Step 6: Remove the finished button from the crimp die. |
|
 |
 |
|
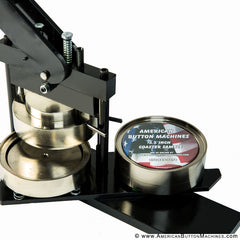
Step 7: You are now ready to apply the adhesive backed cork to the backside of the button.
|
Step 8: Note the button on the left (made using the coaster insert) is completely flat.
|
Step 9: To remove the coaster insert from the upper die, insert the rod into the hole on top of the die and press down. The coaster insert will slide out.
|